
Raise your hand if you’re too busy to build an elaborate Halloween costume this year! Or maybe you did have time to put together one great ensemble, but you’ve got multiple events on your calendar and can’t re-wear the same thing. Don’t worry—we’re ready to help! Here’s one quick and easy nod to All Hallows’ Eve that could be a festive fit for work or school: a cross-stitched skull tee-shirt.
Materials

Thrifted tee-shirt
Iron and iron-safe surface
Fusible interfacing
Ruler or sewing tape measure (depending on the technique you use) *
White chalk, an iron off marking pen, or a washable sewing marker (optional) *
White embroidery thread
Small tapestry needle
Scissors
Pencil (not necessary if you have another marking tool)
Washi tape
Embroidery hoop (I see these at Goodwill all the time!)
* NOTE: There are two ways you can measure the grid for your cross-stitching. The easiest and fastest would be to use a removable marking tool (such as chalk or iron-off/washable sewing marker) to draw a grid on the tee-shirt before you start sewing then remove the marks after you’re finished. We didn’t have a marking tool that would come off after we stitched, so we used our sewing tape measure to envision the grid as we went. This method takes a little more time to execute, but may help you skip a trip to the craft store.
Before you’re ready to roll, plan out your design. Here’s the template we used with each square in the grid measuring 1/2 an inch wide and tall. You may want to adjust that for a bigger or smaller design, just keep in mind that the smaller the image, the harder to stitch and the larger the image, the more likely it is to snag.

Step 1: Measure a piece of fusible interfacing that is slightly larger than your finished design will be. I added ½ inch to all four sides. The interfacing will help stabilize the fabric so it doesn’t warp and pull as easily when you’re stitching through it. It will also minimize the damage caused to the shirt by your thick needle.

Step 2: Turn your clean and unwrinkled shirt inside-out and find the center of the chest where you’ll place the design. Set the interfacing carefully in place with the bumpy side down (this is the part that sticks to the shirt when ironed) and iron in place. You can test the edges by gently trying to lift them so you know when you’ve ironed enough.

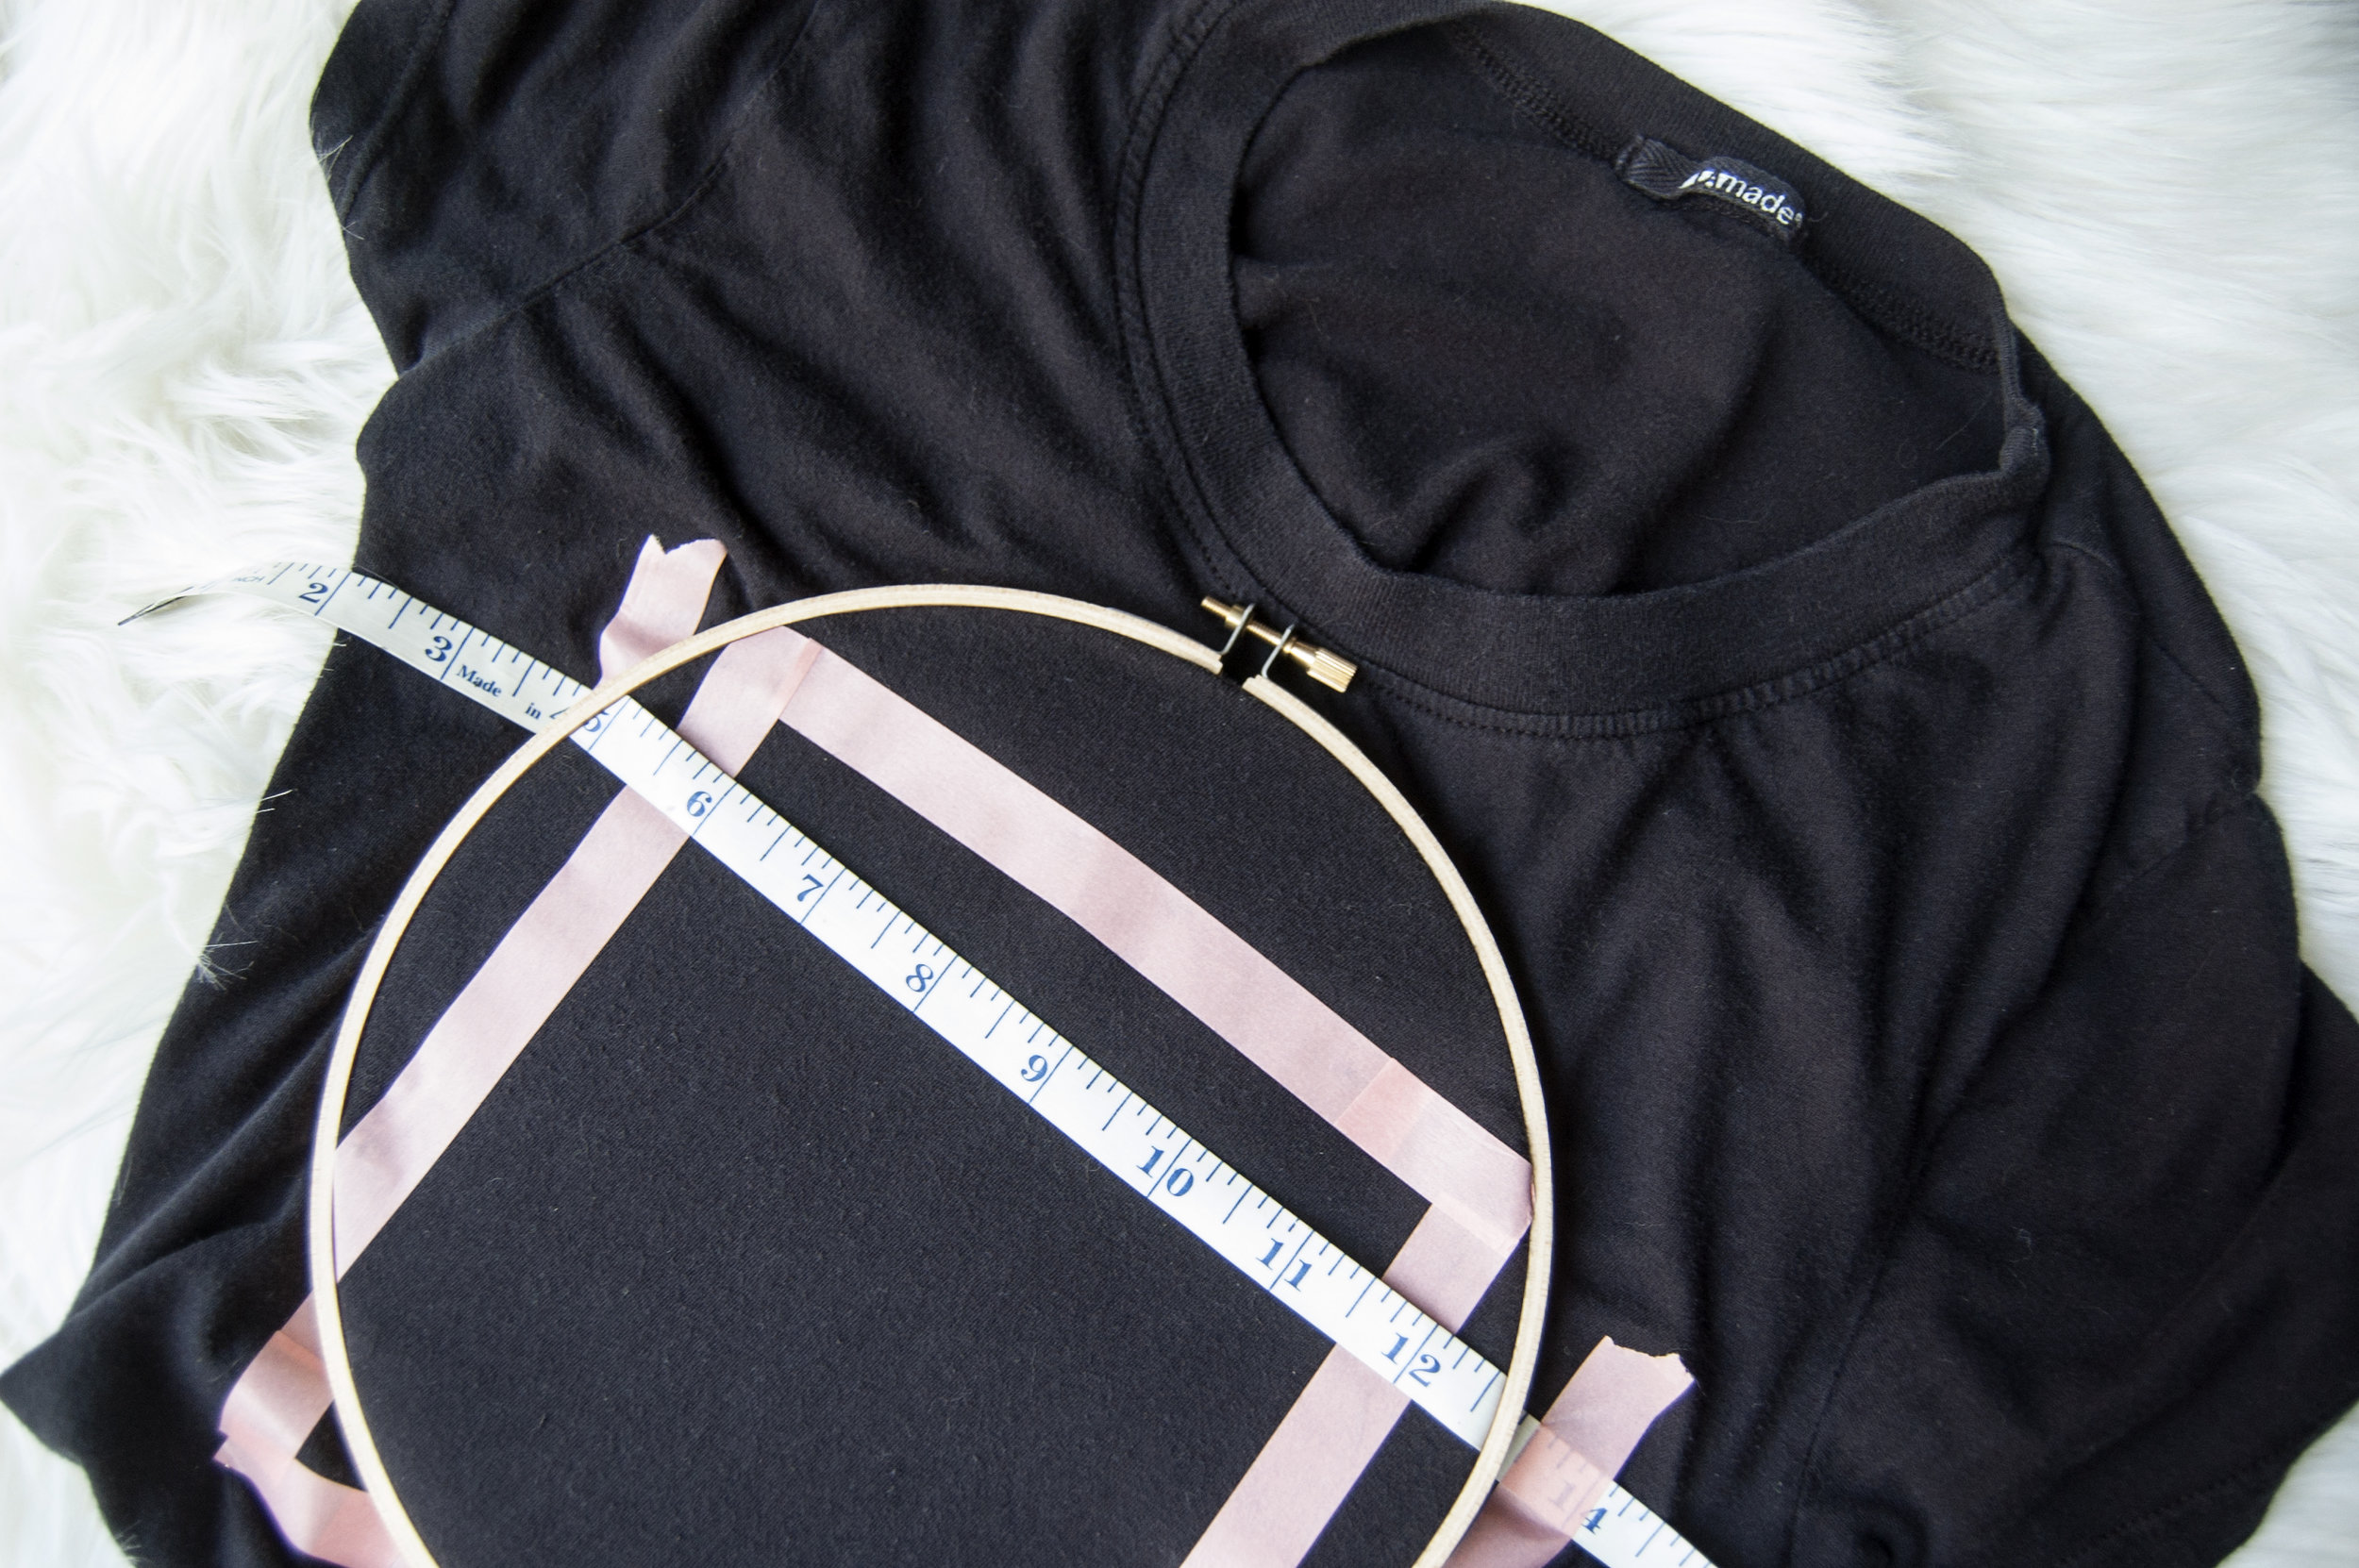
Step 3: Turn the shirt right-side out again and measure a rectangle of washi tape onto the shirt so that the inside of it is the exact size your finished design will be. My skull is 5 ½” wide by 6 ½” tall so the inside edges of my tape marked that space out. Make sure that the entire open area inside the box lies within the area covered by interfacing.

Step 4: Here’s where you have a choice of method. I’ll call them the removable grid (drawing a grid on the shirt with a removable marking tool) or invisible grid (measuring each row one at a time as you go without marking the shirt).
Removable grid method—Use a ruler to measure out your grid within the box you created. Mark that on the shirt and remove the grid by washing or ironing after you’ve finished.
Invisible grid method—Place your sewing tape measure down on the shirt leaving the exact height of your cross-stitching squares above the line (for me, it’s ½” so you can see I’ve created an invisible row that is ½” tall). Make sure the tape measure lines up with the right and left sides of the taped off box so you can easily visualize the width of each stitch. Use tape and the embroidery hoop to hold everything in place and stitch your Xs in place accordingly. As you complete each row you’ll have to take the embroidery hoop off and move the measuring tape down to create space for the next row.
Step 5: Place the embroidery hoop over the area to be stitched and secure by tightening the screw at the top of the hoop until it is snug.

Step 6: Cut a length of embroidery floss then loop one end through the needle as pictured and knot the other end. You don’t need to separate the individual threads of floss since we want the image to be bold enough that it stands out on the shirt.
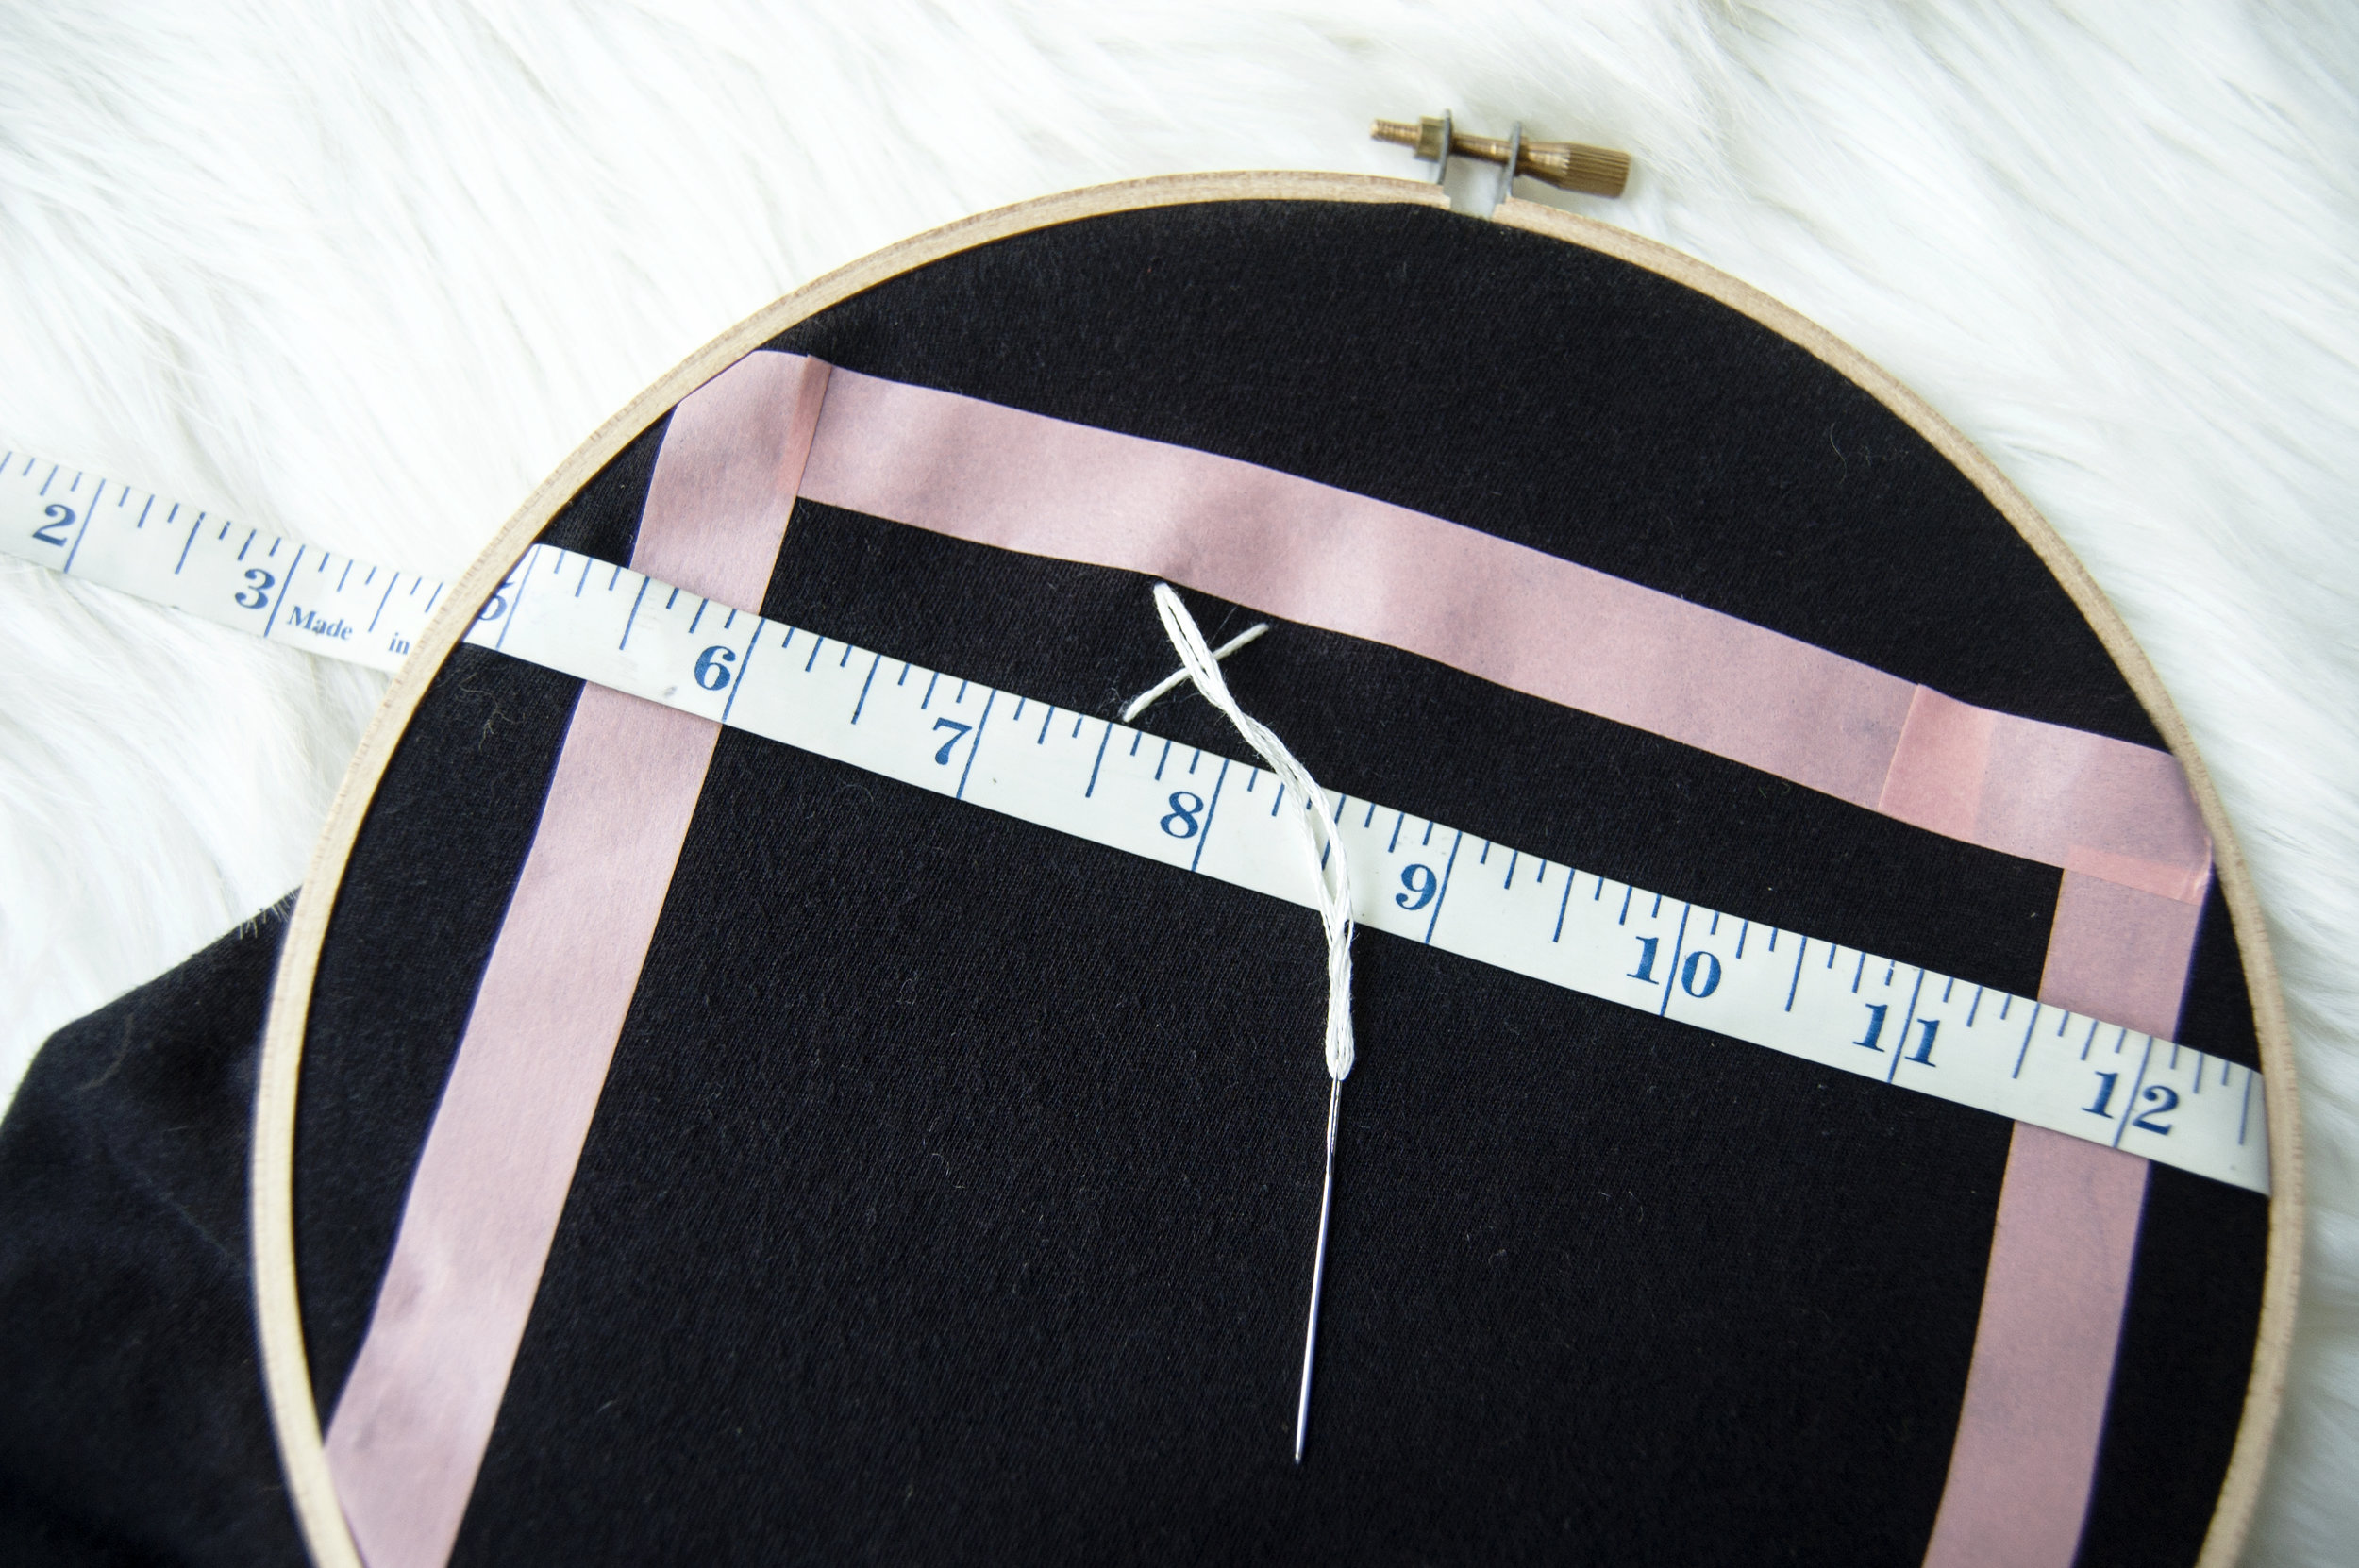
Step 7: Place your first stitch through the back of the shirt so the knot is hidden making Xs to scale according to your template. It doesn’t matter which part of each X is on the bottom or the top as long as you’re consistent to keep the design looking crisp. Move along adding stitches row after row. When your length of floss is getting too short, knot it on the inside of the shirt then trim the excess. Rethread as needed.

Step 8: Pay close attention to the spots that need to be skipped and you’ll be done before you know it! When your design is finished, tie it off on the inside of the shirt, trim the excess thread, then remove your hoop and grid!
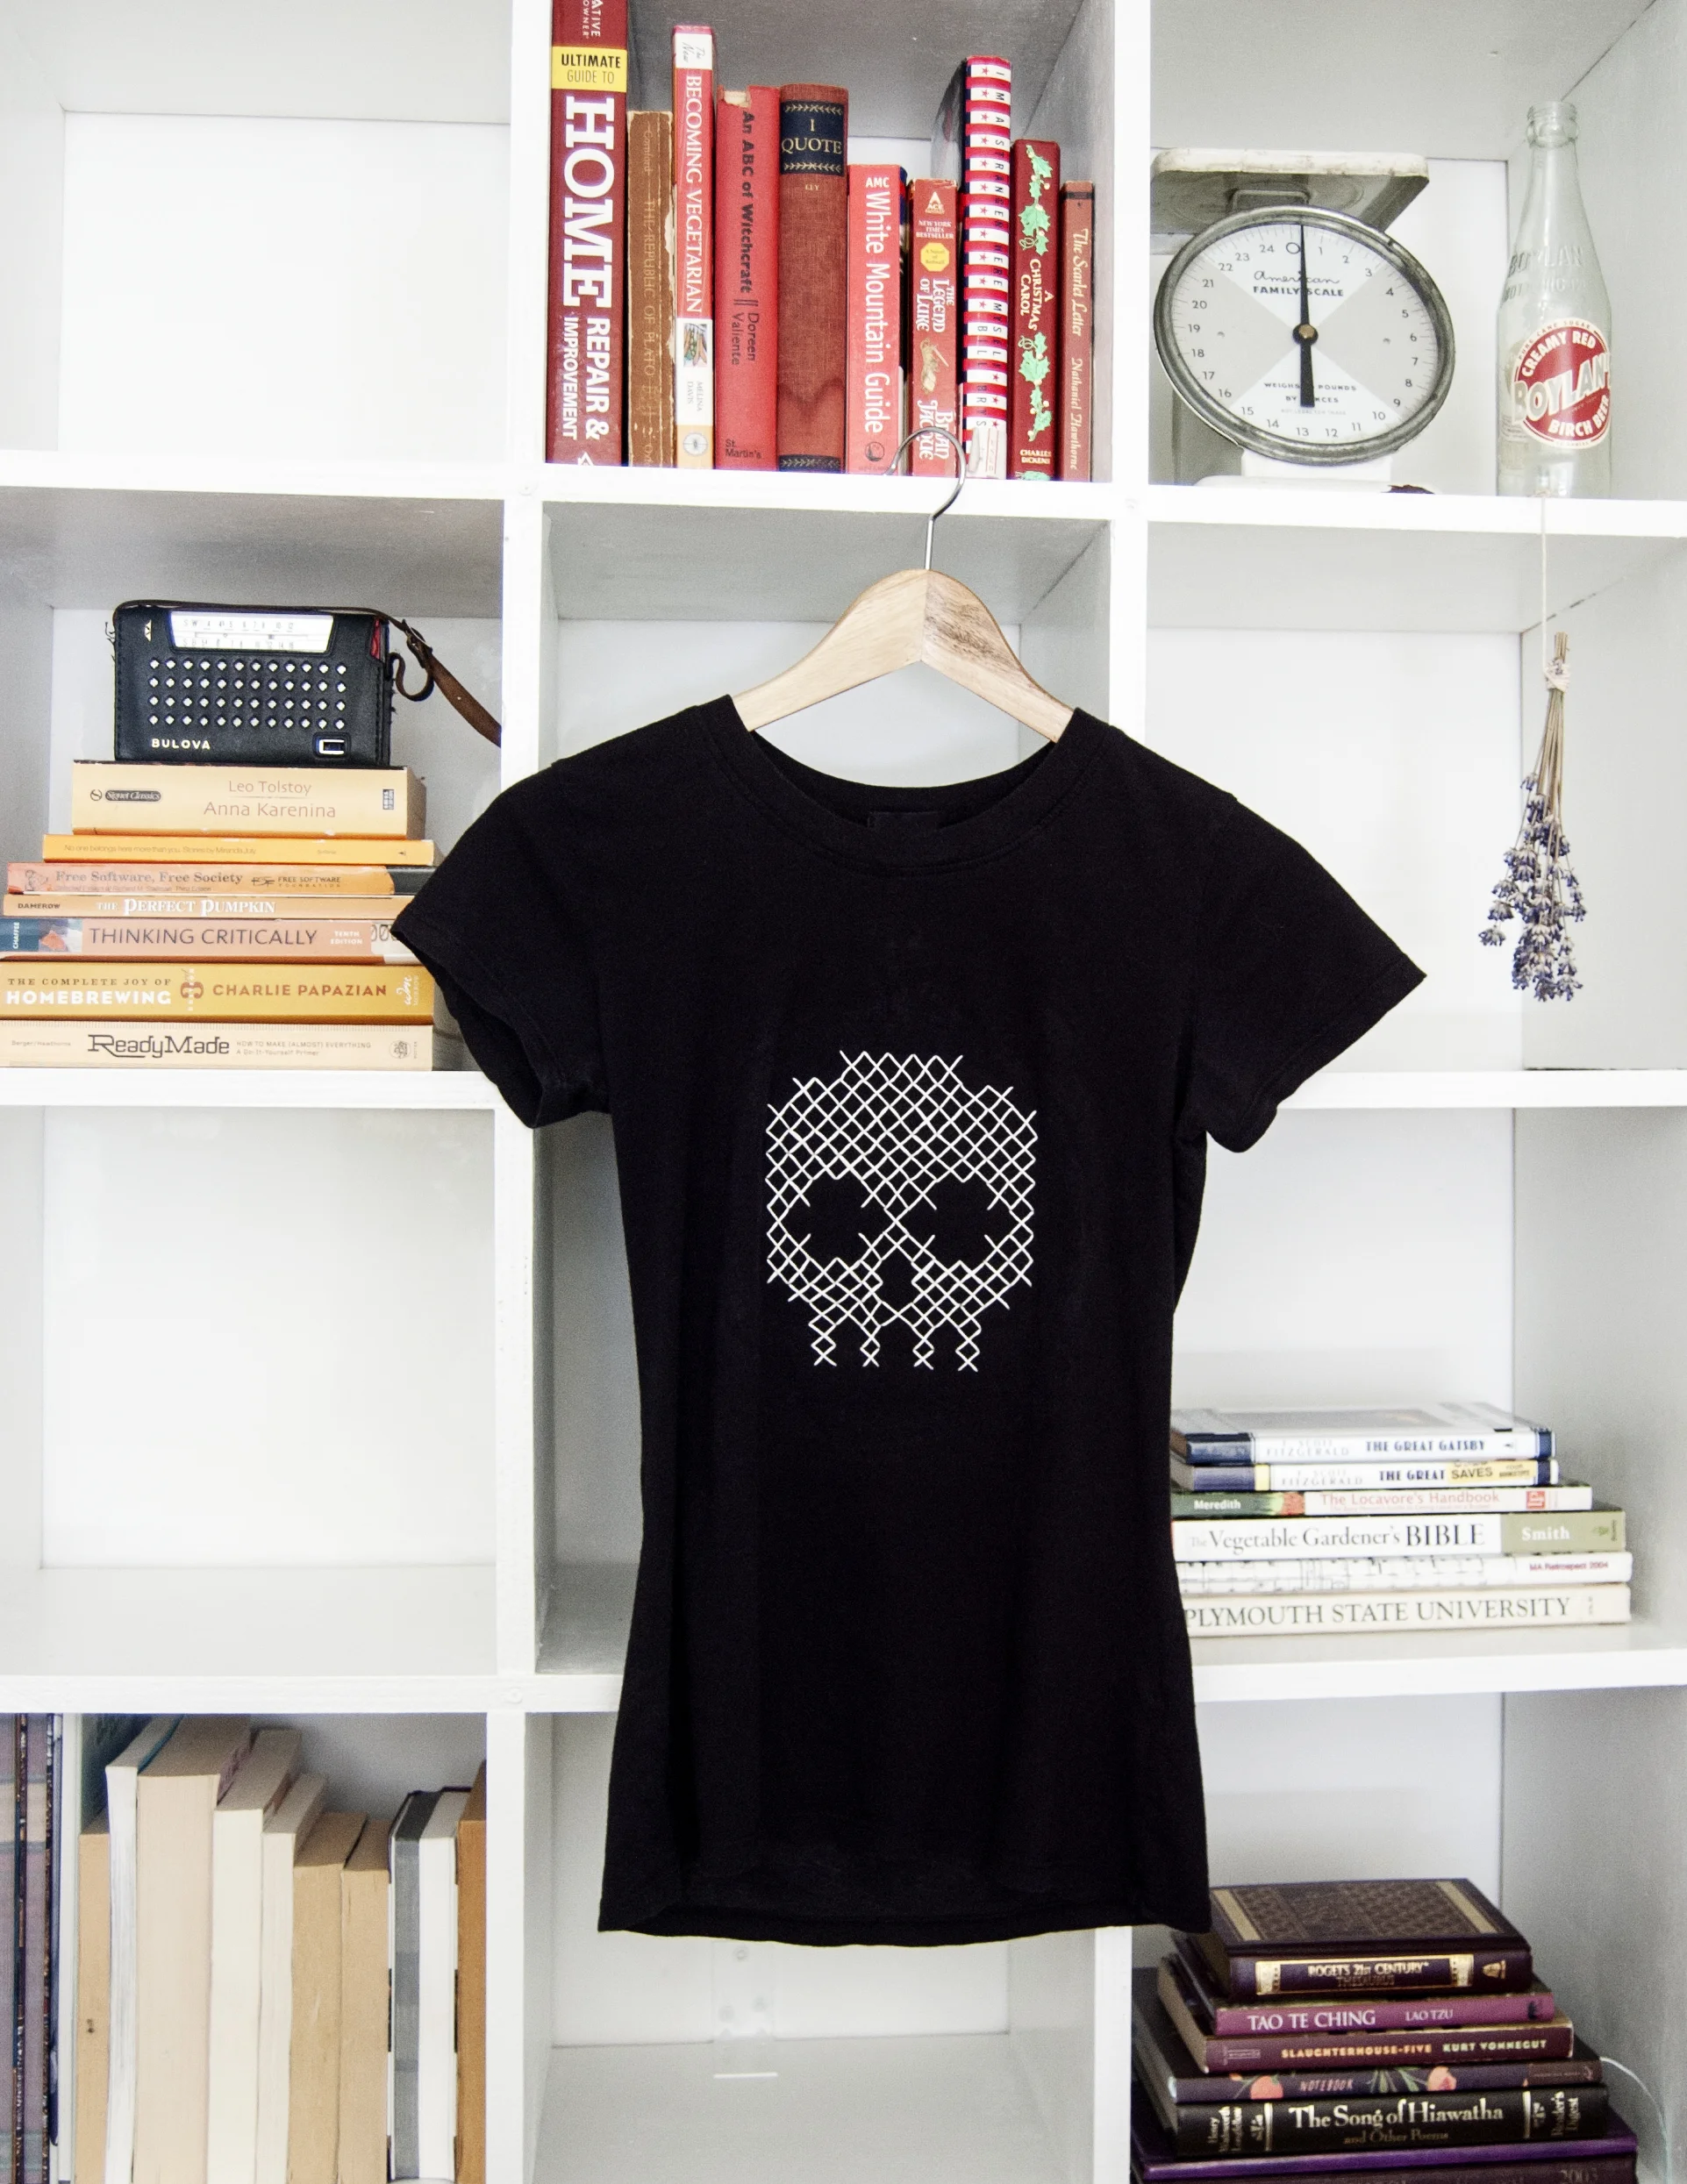
With your spooky new tee-shirt, you’ll be ready for ghoulish last-minute gatherings and seasonal non-costume events alike. And since Goodwill organizations provide individuals with opportunities to turn their jobs into careers, when you shop for second-hand project supplies your quick clothing update is a good deed in disguise. Happy Goodwill haunting!